Photobucket Photobucket Photobucket Photobucket Photobucket

Monday, January 31, 2011

stacked enchiladas


remember this taco filling?...well just thaw in the microwave for a minute, add a can of enchilada sauce, and layer that with some corn tortillas, spanish rice, and cheese. top with lots of cheese and bake at 400 until bubbly! Instant enchiladas if you've got theat filling already in the freezer!

Creamy Chicken Pesto Fettuccine


Creamy Chicken Pesto Fettuccine
1/2 box cooked Fettuccine noodles
2 cups Alfredo sauce
1/2 cup of prepared Pesto sauce
1 cup mushrooms
2 chicken breasts
olive oil
garlic powder
black pepper

Cut Chicken into bitesized chunks and cook in a pan with olive oil, garlic powder and black pepper. When chicken is done cooking, remove from the pan and set aside. In the same pan, saute mushrooms in olive oil until soft. Add together all the ingredients (noodles, pesto, alfredo sauce, sauted mushrooms, and cooked chicken) and toss together. top with pamesan cheese and serve with garlic bread!

Easy Rotini Lasagna

I love Lasagna, in fact, i was drooling over Nikkis recipe this morning! But, i rarely have time to make it, so this is a super easy was to get the same taste.


Rotini Lasagna Bake
8 oz of cooked rotini pasta (or whatever shape you like)
1/2 lb. cooked ground beef or italian sausage, or a mix of both
1/2 tub of cottage cheese
1/2 a jar of spaghetti sauce
1 cup of mozzerella cheese

After cooking the pasta and meat, mix all of the ingredients except for the cheese in a casserole dish. cover with cheese and bake at 350 until the top is bubbly and slightle browned.

Southwest Chili Salad

I have a slight addiction to salads, not because they are healthy... because most of the time i add things that make them UNhealthy... but this is my current fav!

Southwest Chili Salad
Salad Greens (lettuce, spinach, salad mix, whatever ya got)
Carrots
Crushed tortilla chips
Canned chili
Ranch dressing
Taco sauce or salsa

Layer all of the ingredients in a bowl and enjoy! it's SO yummy! and a really fast lunch!

Menu Monday

This weeks menu for our family...
Monday-BBQ chicken pizza and green salad
Tuesday- Sloppy Joes, green salad and baked potatoes
Wednesday- Tortellini Chicken Alfredo and garlic bread
Thursday- BBQ Steak, rice pilaf, and green salad
Friday- I'll be on my owm... so I'll probably hang out at my moms for dinner!
Saturday-DATE NIGHT :)
Sunday- Sweet Pork Roast, broccoli and rolls

lasagna.

-italian sausage, cooked
-diced tomatoes, added to the cooked sausage
-1 cup ricotta, 1/2 cup parmesan, 1 1/2 cup mozzarella cheese mixed together in bowl
-salt, pepper, dash of italian seasoning added to cheese mixture
-1 cup mozzarella for on top, with a dash of dried basil 
-lasagna noodles, cooked and ready for layering.

layer it up. 
sauce.noodles.meat and tomatoes.cheese.noodles. x6
{or smaller or larger, depending on size of dish}
cook for 25 minutes at 400 degrees or until cheese is bubbly and browning.

SUPER easy. SUPER yummy.

Friday, January 28, 2011

handmade by heather b. & bebecha

Heather's my sister in law and she's amazing at everything she does. point and case. check out her etsy shop.
she supplies me with the cutest headband and shoes for miss Scarlett.
Today is a big day for her, she is featured on Ucreate! she totally deserves it too, her stuff is awesome and really good quality. Take a look at her Etsy Shop. and also her feature on Ucreate! 

Photobucket

Photobucket


Also, my sisters friend has an etsy shop, facebook and she sells her stuff at Shade stores and downeast outfitters! You have also seen me sportin' her earings and hair clips, I love them, I have really sensitive ears so earings I buy have to be higher quality, her earings don't bug my ears at all and I love the style!
check out her etsy shop or facebook Bebecha.

Photobucket

Photobucket

Wednesday, January 26, 2011

Wonderful CD's!

I've never been much of a fan of baby music, it always seems to be so cheesy. But these cds changed everything for me! The first one i got was from my grandma, they are all songs from the children's primary songbook, but updated and sung to the most BEAUTIFUL lullabies you have every heard! Im not kidding they are incredible!
The second one i got my mother in law gave me. I was a little sceptical and thought that it was going to be... well corny. but they have wonderful songs on there! it has Edelweiss (from the Sound of Music) and Stay Awake (from Mary Poppins), and once again, they are updated and absolutely GORGEOUS! I highly recommend these cds! even if you dont have a baby! they are just wonderful songs to listen to! Im for sure going to buy the third cd when i can find it! you can listen to parts of the songs at Walmart.com

Beaded Watch Bands

So you know the watch bands that look like this

Well, did you know that they are SUPER easy to make!? they are a little time cosuming, but Shaunie and I have done girls night and made a BUNCH of them! I have wanted to do a tutorial, but it's kind of hard to explain, so i'll let THIS site teach you! And then you can buy the faces SUPER cheap at THIS site!
Trust me, you'll never pay $35 for one of these watches again!!

xo valenties block

I actually made this last year, but i really like it and will probably make a bigger one this year! I just started with a chunk of 2x4 (it really doesn't matter what size, just use one you have lying around) and painted it light pink. Then i cut out a TON of little x's and o's with my cricut and stuck them randomly all over the painted block (if you don't have a cricut, you could always just get a paint pen and draw them on) To finish it off i tied a piece of scrap ribbon that i had around it. It's fast, simple and super cute!

mushroom provolone burger


My husband requested hamburgers for his birthday dinner, but that seemed SO boring! SO i raided my fridge and came up with these, and BOY were they yummy!

Mushroom Provolone Burger
burger patties
garlic powder
seasoned salt
black pepper
mushrooms
olive oil
provolone cheese
spinach
mustard
hamburger buns
bread and butter pickles

Season your burgers with seasoned salt, black pepper and garlic powder and put them on the grill until they are done to your liking. Break up mushrooms into chunks and saute in a little bit of olive oil, season with the same seasoning as your burgers. when mushrooms are soft and caramelized, place them on top of your burger patty, place a slice of provolone on top and cover with foil until the cheese is melted. Put the patty on your bun, and top with spinach, pickles and mustard and ENJOY!

Tuesday, January 25, 2011

Philly Steak n’ Cheese Sands

For 5 years of my high school and early college life, I worked at a little known place in Washington city, UT called 'the Burger Place'. I learned how to cook many yummy and delicious things during my 5 year run. This is probably my most favorite thing. My hubby Loves it, and it only takes about 10 minutes (or less) to make {insert shouts of "wa-hoo" and "Yipees" here}.

Items needed: 2 steak portions, 1 green pepper (I use about ¼ diced up), 1 white onion (I only use a few rings, diced up), and some type of hoggie bread, and a few dashes of season salt and black pepper, and 2 slices of cheese. (I prefer yellow American cheese).

*I always defrost my steak before hand, so it cooks up quickly*

1- Grill meat. Grill veggies with a bit of water and cover with lid to soften (maybe 2 minutes or so). **Stirring meat and veggies through out to avoid burning. Once steak is about done, mix in veggies and grill for about another 5 minutes until it looks done. Sprinkle on seasons, mix again.

2- Divide into 2 servings. Toast inside of bread.
3- Put cheese on top of Philly meat mix to melt (if desired, I just put it on my bread), and scoop onto toasted bun.

4- EAT and ENJOY!

*I also just buy the Thinly Sliced Beef Philly Steak from Walmart (in the freezer section). It comes with 4 frozen portions. (as seen below)

delicious recipe blog.

these banana bars are seriously the BEST thing ever to hit my mouth.
I can eat about 2 sheets of these bars...and finish off the frosting.  

This blog is done by a friend of mine and she makes some awesome foods!
{of which all are delicious!!}

banana bars found HERE.
blog HERE.


Monday, January 24, 2011

Menu Monday

I LOVE when people put their weekly menus on their blog! I think its so fun to see what everyone is eating. So i thought I'd jump on the bandwagon! Plus i think it might help me actually STICK to my menus! So here is the Strattons menu for the week!

Monday: Navajo Tacos, carrot sticks and ranch

Tuesday: (My darling husbands birthday dinner, so he chose...) Hamburgers, Maccaroni Salad, veggie tray and ranch dip.

Wednesday: Honey Lime Chicken Enchiladas (recipe on sisters cafe blog) refried beans, chips and homemade salsa.

Thursday: Calzones, Green Salad, and jello salad.

Friday: Beef Stew and rolls.

Saturday: Snowmobiling ALL day, so we will probobly go out to eat after, if not, we will probably have leftover beef stew.

Sunday: BBQ Teryaki salmon, rice pilaf and steamed broccoli.

If you have a weekly menu for your family please share!!

Thursday, January 20, 2011

My new favorite cooking blog!

I came across this cooking blog today and spent FOREVER looking through all the recipes! they all looks SO yummy, and they were things my family would eat! It's 5 sisters that post all the recipes and they have great ideas! Here are a few i want to try (trust me, it was HARD to narrow it down!!)
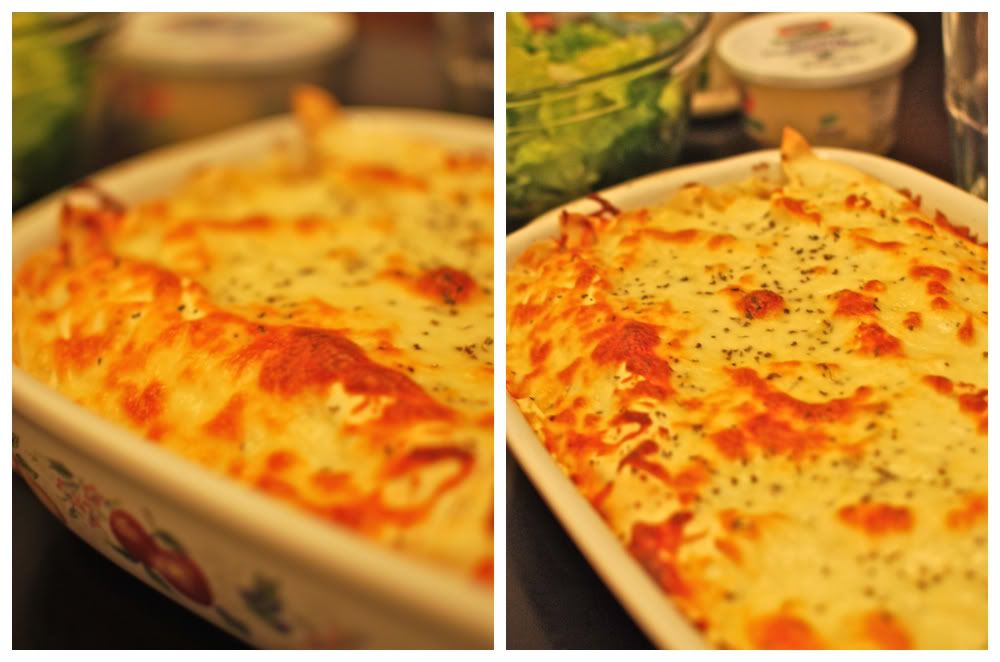
cranberry pork roast

sweet bbq chicken kabobs

lemon blueberry yogurt bread

creamy lemon chicken

chicken quinoa soup

cranberry scones

Valentine’s Day Goodies

I was reading through Parents Magazine (February 2011 issue, page 104-105) and came across the most yummy looking Valentine's treats! I can't wait to make them for grandma's and grandpa's for Valentine's Day!! It's also a great way to involve your children in the treat making process…

Do they not just look DELISH?!


Peanut Butter Balls

Mix 1 cup creamy peanut butter, 1 ½ cups powdered sugar, 5 Tbsp. unsalted butter, at room temp, and ½ tsp. vanilla in large bowl.

Knead mixture until smooth, adding up to ½ cup more powdered sugar as needed to prevent sticking.


Roll dough into 1" balls and set on a wax paper-lined cookie sheet; chill 1 hour.
Line 2 more cookie sheets with wax paper; set aside. Place assorted sprinkles in shallow bowls.

Microwave 1 ½ cup light cocoa candy melts, stirring every 15 seconds, until smooth. Drop the balls 5 at a time in the melted chocolate to coat. Remove balls with fork, allowing excess chocolate to drip off. Roll balls in sprinkles to coat. Place on lined cookie sheets. Repeat with the remaining balls, then chill until chocolate is set.

*Makes about 40 peanut-butter balls. (Keep your pint-size candy makers busy rolling the dough into balls.)

Cream Cheese Melts


Mix 4 oz. cream cheese, 1 Tsp. butter, 1 Tsp light corn syrup, and ¼ tsp. mint extract in a large bowl until smooth.


Gradually beat in 3 cups powdered sugar. When the mixture starts to come together, turn it out onto a clean work surface and knead, adding up to ½ cup more sugar to prevent sticking, until dough is smooth.


Divide dough into three even pieces. Tint one part Dark pink, one part light pink, and leave third part white.


Roll each portion into a 15"-long rope. Twist the 3 ropes together and roll into a single rope about ¾" wide; flatten slightly and cut into ¾" tri-colored pieces.


Spread the mints out in a single layer on parchment-lined baking sheets; cover and chill about 4 hours.


*Makes about 50 pieces.

This is just 2 of 4 delishous looking recipes that you should try. Check out Parent.com for more awesome Valentine's Ideas.

Wednesday, January 19, 2011

Clean.

I want to tell you about an all purpose cleaner that I LOVE.
Mrs. Meyers Clean Day All Purpose Cleaner has turned me into a compulsive counter wiper.  I'm not kidding you... I make up excuses to clean my counters now that I've found this stuff.  You can buy it in a Countertop Spray, but I liked the idea of the All Purpose Concentrate so I could have flexibility in the way I use it.  They also make various bathroom cleaners, dishwashing soaps, surface wipes, window spray and air fresheners.  Beyond that they also make hand and body, laundry, and baby care products.

Mrs. Meyers makes earth friendly cleaners that are biodegradable and phosphate free.  I would never claim to be an avid enthusiast of earth friendly products, but I can always appreciate a product that is safer for my family.  To be honest, the many things that make this product great are not the reason I love it.  I love it for the smell.
I had a really hard time choosing which scent I should buy, but I'm so glad I settled on Basil.  It smells so fresh and clean.  Slightly sweet.  Mostly just fresh, and I love it.

I picked up my bottle of goodness at Wal-Mart but its also available at Target, in various grocery stores, and the company's website.  Happy cleaning.  And sniffing.  :)

Tuesday, January 18, 2011

Valentines day.

I'm definitely not as talented as Steph with all the adorable 
Valentines day decor..she's got that down!
 But this is one project sophia, my daughter and I, 
are going to do together next month:


BUT....
we are using brown paper bag paper instead of these cute colors, and I am 
having sophia stamp her thumb in some pink ink to put along the outside of the petals.

but I love this idea. it's so easy, and cute. 

Monday, January 17, 2011

3 valentines projects

For some reason i am really getting into valentines this year! i think its the fact that its not just beau and i anymore, having a family makes holidays 100x better! So i have seen a whole bunch of cute ideas and heres a few i have copied :)

Valentines Candles
I bought these candles at walmart after christmas for like .25 not really knowing what i wanted to do with them. Well, my mustard yellow candles weren't really doing for me next to all of the pink and red in my house, so i fished the white ones out of my 'extra decor' tote, and raided my ribbon boxes and pulled out all the pinks, reds and browns i could find. Then i just tied random pieces around the candles and now they look very 'valentine'esqe'! i love them!

Valentine Subway Art
This is the new rage in blog land i've noticed, so i decided to give it a shot! I just used a scrap of MDF board that we had in my wood box and spray painted it red. I did all the words in vinyl, and it was a lot of work, but im sure it would be a TON easier if you just typed it, printed it and framed it. But i really like how it turned out!

Valentine Plate Rack
I was super excited about this project! I bought the plate rack at Tai Pan for like $12.00 (i used a 20% off coupon) and the plates for $1.75 a piece at walmart. Then I just cut the vinyl with my cricut and put it on the plates! I'm going to make a set of plates for every holiday. It's going to be a fun, inexpensive way to decorate year-round! :)

I have a few more ideas in the works... but I guess those will have to come later! Hope this gets you in the valentines mood!!

Sunday, January 16, 2011

color


i am ALWAYS searching for color palates that i like. I have tons of blog headers saved to my computer just because i like the color scheme! So i was in love with this site when i found it! It has tons of palates to choose from, and it just gives you the hex code so you can use it on photoshop (or whatever you use).
anyways, i hope all you color junkies love this as much as i do!

Friday, January 14, 2011

personal picks.

                1-3.found HERE. 4. found HERE.

So I love great skin care. Here are some secrets, that I personally love. 
Bare minerals and I are friends. I love this makeup..if you haven't tried it, do!
It feels like you are wearing nothing and it covers up great. Not to mention it doesn't 
have all the crud in there to clog up your pores. It's natural and soft on your skin, plus 
has spf.  Numbers 2 & 3 are just glycolic and lactic acid washes, something that will help 
tone your skin. It is basically a mini lactic {or glycolic} peel, which will lift a lot of sun damage, acne scars, 'brown spots", etc. it's nice to just even out your skin tone. But make sure to know that your skin 
is uber sensitive while doing this, so don't go outside without sunscreen. 
number 4 is my favorite of all. I love Aveda! a lot!! This is the tourmaline line, it's amazing.
I have super dry skin and this stuff doesn't mess. The exfoliating wash is so soft on your skin, not 
stripping everything off your face..like some exfoliating washes. The creme goes a lonnnng way. 
I would only use like a teeny tiny amount and feel so hydrated all day long. I have never used that
radiance fluid, but I would suggest it..because I love aveda, haha.

but yah, this is my little spill on keeping your face pretty. 
Which it's just as important, if not more, in the winter to use 
these things. Keep your face super hydrated and healthy. Exfoliating
it regularly will help sluf off all that dead winter skin, and toners will
help with all that red skin. Keep your skin healthy and happy this winter!

Thursday, January 13, 2011


Ok Ladies, here's an attempt to show my sewing skills. :)
This past July (6 months ago, I can't believe my baby is 6 months old) I was blessed with a handsome lil' man. Sadly, he is the 2nd child, and our first was a GIRL. So everything we have is PINK!! And since I can't do what I'd like to do, go out and buy all new boy things, I had to improvise. Pink Car seat now, but Denver Broncos/sports balls Car seat Canopy Cover will help it be a bit more manly for my lil' guy.
I just followed the tutorial from this site. It was so super easy! Anyone can follow it, in fact I've made several to give away as gifts!! :)
Happy Sewing, ladies!

steps to a picture perfect manicure

Now i don't think a nail tech should be saying this, but i think a well done manicure looks better than acrylic nails any day of the week. And i REALLY shouldn't be saying this...you CAN do it at home!! here's a few tips....

-Clip your nails all to the SAME length! nothing looks worse than that one stray long nail.

-Soak your nails. (and do this AFTER clipping, if you do it before you will cause tearing and ripping of the nail.) I always thought this step was pointless, but it REALLY helps on the next step, which is pushing back your cuticles. this makes your manicure look SO much more professional. but only do it when your cuticles are soft, otherwise you can cause tearing and splitting at the nail base, which in no bueno.

-USE A BASECOAT!!! i promise this does WONDERS! it bonds the polish to your nail and helps with chipping and cracking, as well as preventing dark polishes from staining your nail! choose one that says 'milky basecoat'

-Use a good polish. Personally, i like Orly, and OPI. but any nail LACQUER (not 'nail color') will work. The only walmart brand i even buy now is Sally Hansen hard as Nails Xtreme Wear. I guess if you are in a pinch, NYC is a decent brand, but if you can get it, OPI and ORLY are the best!

-Now here is the painting technique. First, paint one wide strip down the center of your nail. then fill in the sides and WAIT! Let that coat dry, don't try and paint over and over it while its still wet, thats when you get the 'gooey' look. not pretty. add a second coat, and after that dries, if you feel like it needs another, add one more, but never do over 3 coats. Now, IMPORTANT STEP ALERT! after your last coat, while it is still a little tacky, take your polish and do a thin strip across the very tip of your nail. not on top, but on the tip. This will help prevent the chipping and cracking.

-Apply a top coat. Yes think works! and keep aplying it every few days. it will help prevent chips, and keep your polish looking shiny.

-Now heres the kicker... nail polish takes anywhere from 6 to 8 HOURS to dry! even if the top feels dry, if you bump it on a hard surface it will crinkle of smudge. my tip, paint them before bed, or church if you have time, or any time that gives you a few hours of limited acrivity.

-What if your polish does crack? paint over it IMMEDIATLY! and finish with a top coat. if you wait, the chip/crack will just keep getting worse and worse.

-One more thing... OIL YOUR CUTICLES DAILY!! nail oil isnt pricey and it does WONDERS! and if you have SUPER dry cuticles, like cracking and bleeding, or a lot of hangnails, use carmex on them twice a day! ITS AWESOME!

I hope this helped some of you!

Wednesday, January 12, 2011

Chicken Pillows

Chicken Pillows
1 can crescent rolls
1/2 block softened cream cheese
1 cup shredded chicken
1 tsp. Worcestershire sauce
1/4 tsp garlic powder
1/2 tsp dehydrated onion flakes

Sauce
1 can cream of chicken soup
3 TBS milk
1/2 tsp worcestershire sauce

Unroll crescent roll and divide into 4 equal rectangles (2 triangles each) Mix cream cheese, worcestershire sauce, garlic powder and onion flakes. place 1/4 of the mixture on one half of the rectangle. Fold other half over and pinch seam together, and brush top with butter. Repeat for all 4 pillows. Bake until tops of rolls are golden brown, about 15 min. While your pillows are cooking, combine cream of chicken soup, milk and worcestershire sauce in a small saucepan and simmer until warm. if you want your sauce thinner, just add more milk. When pillows are done, top with sauce and enjoy!

Corndog Muffins


I first saw this idea on my husband's aunt's recipe blog, which is AWESOME! She is one of those amazingly good cooks that makes everything taste like your grandma made it! Anyways... I kind of simplified my version. This is SUCH a kids food, but we love kid food, so it was a hit with us!

Corndog Muffins
(makes about 8 muffins)
1 package jiffy corndog mix
1 egg
1/3 cup of milk
1 TBS honey
4 hotdogs

Cut up hot dogs into bitesized peices (i grilled mine because raw hotdogs make me gag) combine the rest of the ingredients. (the egg and milk are just what the jiffy mix says to add, if you use a diffrent brand, use what they suggest) add hot dogs and pour into a greased muffin tin. bake for 15-20 min. or until a toothpick comes out clean. Serve with ketchup and mustard.
These taste JUST like corndogs, but without all the nasty deepfried oil!

4 Ways to Soften Brown Sugar


Have you ever run out of brown sugar in the middle of baking - only to pull out a bag from your food storage and find it's as hard as a rock? I can't tell you how many times that's happened to me. I guess I don't make Brad enough chocolate chip cookies...I'm sure he would agree.

Here are four ways to soften brown sugar:

  1. Microwave - Place brown sugar in a bowl next to a cup of water in the microwave. Soften 45 seconds to 2 minutes, and check every 30 seconds. This method is for quick use and will not keep brown sugar soft.

  2. Oven - Preheat oven to 250 degrees, put in an oven safe dish for 5-10 minutes stirring occasionally. Don't leave in oven longer than 10 minutes. For immediate use.

  3. Overnight Method - Place brown sugar in a bowl with two damp paper towels on top. Cover with plastic wrap and in foil. Throw away paper towels in the morning. This method will keep your brown sugar soft for long term storage.

  4. Bread Method - Place brown sugar in airtight container with a slice of bread for 1-2 days. Toss the bread when you are done. This will also keep your brown sugar soft for long term storage.

Tuesday, January 11, 2011

wreath.


this wreath is SO easy. 

It's just one book (one you don't love). you paint the edges all brown. 
{i used a crayon, way easier}
Rip them all out, get your foam wreath, hot glue gun, 
a good show on..and your set. 
You start on the back of the wreath, twirling the 
paper into thirds, going around in a pretty 
straight  and easy path. Then you flip your wreath around, 
so the rounded part is back on top
and you start twirling and gluing some more. 
Just keep going around and around. I folded the paper
{in the first pic below} so it would give it a more bigger to smaller look. 
at the end, pin a piece of fabric in to hang on the wall..and presto
you are done!!!
It's a super easy, but time consuming, craft. 
good luck.


Use the code STMMMS84668 to get $10 off instantly!
Related Posts Plugin for WordPress, Blogger...