

Awhile back, in this post, I mentioned that I had made this frame...

Well this frame because more popular on Pinterest than the frame I did the actual post on! So I thought I'd do a post on how to 'stack' frames.
I started with 2 frames, one was an 8x10 that I have had forever, the second was somewhere in between an 8x10 and an 11x14, it was a yard sale find. They were both just fine on their own, but I can't even leave anything alone.

All you really need to look for is that the top frame will cover the back frames opening. Make sense?


Then, using a strong adhesive ( I used Emler's Glue-All) glue your top frame to your bottom one. Allow to dry overnight.

Please please please make sure your frames are straight! I used a ruler to measure the distance from all sides.

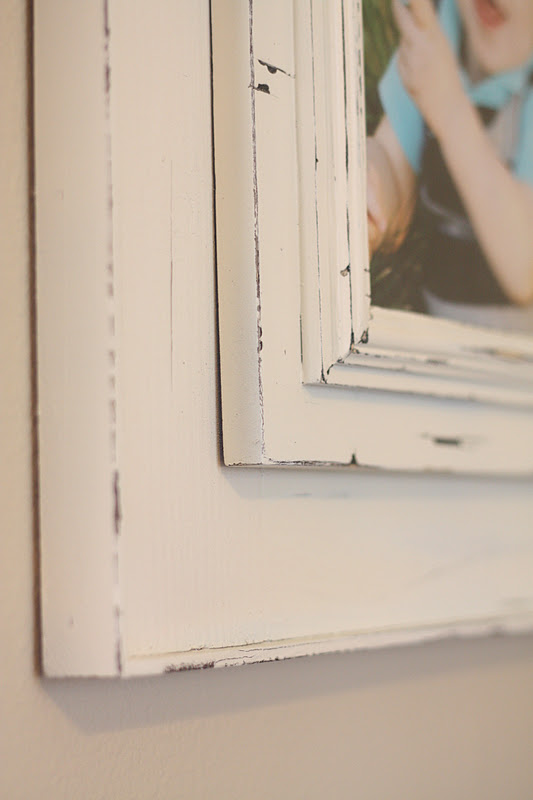
When it was done drying, I spray painted mine white, actually white, then brown, then white again. Make sure you get it covered well, because most likely your frames wont be the same color underneath.

Here's the fun part, for me at least! Distress!! Bash and bang that baby up to your hearts desire!

I used sandpaper and get this... a KNIFE! Yup, I just took a cheap serrated steak knife and used it to (lightly) carve grooves into the wood, and chip off some of the paint. ALL of the dents and dings and lines you see were done with the knife, and then ran the sandpaper lightly over the whole thing.

then all you have to do is dust it off and hang it! Sorry for the horrible lighting, I wasn't patient enough to wait till tomorrow when the sun was higher.


I think thicker, bulkier frames look so much nicer than the thin ones that are in most stores, and this way, you don't have to pay $45 a frame at a boutique!
I hope this gives you some inspiration to look at your frames in a new light and start stacking them up! Trust me, you'll be amazed at the difference!
What a great idea. I will definitely be making some of these for around my home. I love reading your blog. I found it one day as a link somewhere else. Thanks for all the yummy recipes too.
ReplyDeleteWow, this is amazing! I have got to do this ASAP! What a great idea--so inspiring! I am pinning this now. :)
ReplyDeleteI love what you did with that frame! It honestly seems like that's what it was meant for all along :)
ReplyDeleteLove this idea, frames are so expensive so any DIY ideas for them are appreciated.
ReplyDeleteSarah
www.budgetfriendlydecorating.com
Oh, I love this! What a cute frame!! :) My friend just emailed me your blog and I'm so glad she did! I'm now a new follower and Facebook fan! :) xo, Reannah @ShapedbyGrace
ReplyDeleteWow! What a great idea and yours turned out so cute! Just found your blog and love it!
ReplyDeleteI Love this!! Cant wait to try it!
ReplyDeleteSuch a great idea! I never would have thought to do this.
ReplyDeleteThanks for sharing this!
ReplyDeleteOkay. It's official. I have to make a couple of these for some weddings I am attending this year. I could never find the right chunky frame for cheap. But this solves that problem. I never would have thought of it. Thanks. :)
ReplyDeleteI found this post on pinterest and am so excited to try it! I ran right out to the thrift store today to pick up some frames. Such a great idea! Your frames look beautiful!
ReplyDeleteI have an 8x10 black and white photo that I want to do like this. Can you recommend or send a link for more chunky frames?
ReplyDelete